Long-exposure photography is a fascinating technique that allows you to capture stunning images with unique visual effects. Contrary to what you might think, you don’t need a fancy camera setup to explore this genre of photography. In fact, you can achieve fantastic long-exposure photos using just your iPhone. As the saying goes, “The best camera is the one you have with you.”
Understanding Long-Exposure Photography
Before we dive into the specifics of capturing long-exposure photos with your iPhone, let’s first understand what long-exposure photography is all about.
Long-exposure photography, often considered a magical realm in the world of photography, allows photographers to capture the passage of time in a single frame. It involves using longer shutter speeds to capture images with motion blur or light trails, transforming ordinary scenes into mesmerizing works of art. By keeping the camera’s shutter open for an extended period, you can create stunning visual effects that are impossible to capture with normal exposure settings.
What is Long-Exposure Photography?
Long-exposure photography involves a delicate dance between light and time. It’s about painting with light, where moving subjects become ethereal wisps and stationary objects anchor the frame with their solid presence. The interplay of light and darkness, motion and stillness, creates a dynamic visual narrative that draws viewers into a different dimension of reality.
The Art and Science Behind Long-Exposure Photos
Long-exposure photography is a harmonious blend of art and science. It requires a keen eye for composition and an understanding of the technical aspects involved. Variables like shutter speed, aperture, and ISO need to be carefully controlled to achieve the desired effect. Each element plays a crucial role in shaping the final image, balancing creativity with technical precision.
Mastering long-exposure photography is a journey of exploration and discovery. It demands patience, experimentation, and a willingness to push the boundaries of creativity. With the iPhone’s advanced features and capabilities, you have a powerful tool at your fingertips to unleash your artistic vision and capture breathtaking long-exposure photos that mesmerize and inspire.
The Role of Your iPhone in Long-Exposure Photography
Your iPhone is not just a device for making phone calls and sending messages. It’s a sophisticated camera that can unleash your creativity and help you capture stunning long-exposure photos.
Long-exposure photography is a technique that involves using a long-duration shutter speed to capture stationary elements sharply while blurring moving elements in the scene. This creates a sense of motion and adds a dynamic element to your photos, making them visually captivating and unique.
Exploring the iPhone Camera Capabilities
The latest iPhone models are equipped with advanced camera features that are tailor-made for photography enthusiasts. These features include optical image stabilization, low-light capabilities, and the ability to shoot in RAW format.
Optical image stabilization helps reduce camera shake, ensuring your long-exposure photos are sharp and clear. The low-light capabilities of the iPhone allow you to capture stunning long-exposure shots even in dimly lit environments, opening up a world of creative possibilities.
Shooting in RAW format gives you greater flexibility during post-processing, allowing you to fine-tune your long-exposure photos and bring out the details in shadows and highlights.
How Your iPhone Facilitates Long-Exposure Photography
The iPhone’s intuitive interface and user-friendly apps make it a breeze to experiment with long-exposure photography. With the right app and a few additional accessories, you can take complete control over your exposure settings and capture stunning long-exposure photos.
Apps like Slow Shutter Cam and Spectre Camera are specifically designed to help you create long-exposure effects on your iPhone with ease. These apps offer features such as adjustable shutter speeds, light trail effects, and live previews, empowering you to unleash your creativity and capture mesmerizing long-exposure shots.
The best part is, you don’t need to carry around heavy camera equipment or invest in expensive lenses. Your iPhone is a versatile and convenient camera that you can carry in your pocket wherever you go. So next time you’re out exploring, don’t forget to experiment with long-exposure photography using your trusty iPhone.
Preparing for Your Long-Exposure Shoot
Before you head out to capture stunning long-exposure photos with your iPhone, there are a few essential preparations you should undertake. Long-exposure photography allows you to create mesmerizing images that capture the passage of time and create a sense of motion. By following these tips, you’ll be well-equipped to embark on your long-exposure adventure.
Choosing the Right Location and Time
The location and time of day play a significant role in long-exposure photography. Look for subjects that have inherent motion, such as flowing water, moving clouds, or bustling city streets. These elements will add dynamism and interest to your long-exposure shots. Imagine capturing the silky smoothness of a waterfall or the streaks of light from passing cars on a busy street.
The best times for long-exposure photography are during the golden hour (just after sunrise or before sunset) or at night when the ambient light is lower. These periods offer more dramatic lighting conditions and longer exposure times. The soft, warm glow of the golden hour can add a magical touch to your images, while the darkness of the night allows for longer exposures, revealing a world that is often unseen by the naked eye.
Setting Up Your iPhone for Long-Exposure
Once you have chosen the perfect location, it’s time to set up your iPhone for long-exposure photography. Here are a few essential tips to ensure you capture the best possible images:
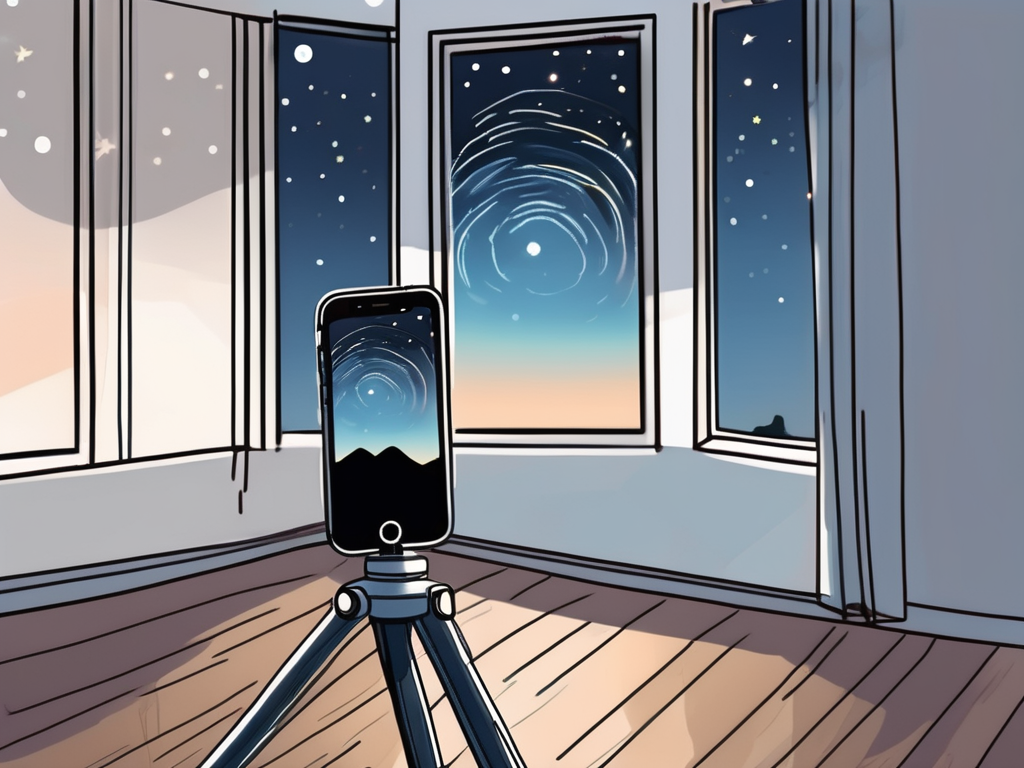
- Use a tripod or stabilizing device to keep your iPhone steady during long exposures. This will reduce the risk of camera shake and ensure sharp images. A sturdy tripod is an invaluable tool for long-exposure photography, providing stability and allowing you to experiment with different compositions.
- Disable digital image stabilization and enable optical image stabilization if your iPhone supports it. This will help compensate for small movements and vibrations, further enhancing the sharpness of your images. Taking advantage of the technology built into your iPhone can make a significant difference in the overall quality of your long-exposure shots.
- Shoot in RAW format to retain maximum image information and allow for greater flexibility in post-processing. RAW files contain all the data captured by the camera’s sensor, giving you more control over exposure, color, and detail during the editing process. This format is especially beneficial for long-exposure photography, where you may need to make adjustments to achieve the desired effect.
- Consider using additional accessories like neutral density (ND) filters to further extend your exposure times and control the amount of light entering the camera. ND filters are darkened pieces of glass that reduce the amount of light reaching the sensor, allowing for longer exposures even in bright conditions. These filters open up a world of creative possibilities, enabling you to capture ethereal scenes with beautifully blurred motion.
By carefully selecting your location and time, and setting up your iPhone for long-exposure photography, you’ll be well-prepared to capture breathtaking images that showcase the passage of time and create a sense of wonder. So grab your gear, find the perfect spot, and let your creativity flow as you embark on your long-exposure journey.
Step-by-Step Guide to Taking Long-Exposure Photos with Your iPhone
Now that you are fully prepared, let’s dive into the practical aspects of capturing stunning long-exposure photos with your iPhone.
Long-exposure photography is a technique that allows you to capture the passage of time in a single image. By using a longer exposure duration, you can create beautiful effects like light trails, smooth water, and blurred motion. With the advancements in smartphone camera technology, you can now achieve these mesmerizing effects right from your iPhone.
Using the Native Camera App for Long-Exposure Photos
The native Camera app on your iPhone offers several features that are conducive to long-exposure photography. Here’s a step-by-step guide:
- Select the desired shooting mode, typically “Live Photo,” to ensure the camera captures a series of images. This is crucial for creating the long-exposure effect.
- Compose your shot, ensuring the subject matter suits the long-exposure effect you are trying to achieve. Consider scenes with moving elements like flowing water, cars, or people.
- Toggle the exposure control by tapping on the screen and swiping up or down to adjust the exposure duration to the desired level. Longer exposure durations will result in more pronounced effects.
- Tap the capture button to begin the exposure. Hold the camera steady for the entire duration of the exposure to avoid any unwanted camera shake.
- The camera will capture a series of images during the exposure. You can review and choose the best shot later during the editing process.
Utilizing Third-Party Apps for More Control
While the native Camera app provides basic long-exposure functionality, using third-party apps can offer more control and creative options. Here are a few popular apps for long-exposure photography:
- Slow Shutter Cam: This app allows you to adjust exposure settings, capture light trails, and even create stunning motion blur effects. It also offers advanced features like noise reduction and image stabilization.
- ProCamera: With ProCamera, you can take full control of your iPhone’s camera settings, including exposure time, ISO, and white balance. It also provides various shooting modes, such as light trail and night mode, to enhance your long-exposure photography.
- Camera+ 2: Known for its intuitive interface and powerful editing tools, Camera+ 2 is a favorite among photographers. It offers manual controls for exposure, focus, and shutter speed, allowing you to fine-tune your long-exposure shots with precision.
These apps open up a world of possibilities for long-exposure photography on your iPhone. Experiment with different settings, techniques, and subjects to unleash your creativity and capture truly unique images.
Post-Processing Your Long-Exposure Photos
Once you have captured your long-exposure photos using your iPhone, it’s time to enhance and refine them using post-processing techniques. Luckily, your iPhone offers plenty of built-in tools and third-party apps to help you take your long-exposure photos to the next level.
Post-processing long-exposure photos can significantly impact the final outcome of your images. It allows you to correct any imperfections, enhance details, and bring out the full potential of your captures.
Enhancing Your Photos with iPhone’s Editing Tools
The iPhone’s built-in editing tools offer a quick and convenient way to enhance your long-exposure photos. The Photos app allows you to adjust exposure, contrast, saturation, and apply filters to give your images the desired look and feel.
Experiment with different editing options to bring out the details, correct any exposure or color imbalances, and create a mood that aligns with your artistic vision.
Moreover, utilizing the editing tools on your iPhone can help you maintain a seamless workflow, allowing you to make quick adjustments on the go without the need for additional software.
Recommended Third-Party Editing Apps
If you’re looking for more advanced editing options, several third-party apps can take your long-exposure photos to new heights. Some popular options include:
- Adobe Lightroom
- VSCO
- Snapseed
These apps provide powerful editing tools and creative filters that allow you to fine-tune every aspect of your long-exposure photos.
Each of these third-party apps offers unique features that can help you achieve specific effects or styles in your long-exposure photography. For example, Adobe Lightroom’s advanced editing capabilities enable you to make precise adjustments to exposure, color, and detail, giving you full control over the final look of your images.
Troubleshooting Common Issues in iPhone Long-Exposure Photography
Even with the best preparation and equipment, you may encounter some common issues while capturing long-exposure photos with your iPhone. Here’s how to troubleshoot them:
Dealing with Blurry Images
Blurry images are often caused by camera shake or subject movement during long exposures. To combat this, ensure you use a tripod or stabilizing device and keep subjects as still as possible during the exposure.
If camera shake persists, consider using the iPhone’s self-timer or a remote shutter release, which will minimize any movement caused by touching the screen or pressing the capture button.
Additionally, another way to reduce blur in long-exposure iPhone photography is by using the Live Photo feature. By enabling Live Photos, your iPhone captures a short video clip before and after you take a photo, allowing you to select a key frame with minimal blur.
Managing Overexposed and Underexposed Photos
In challenging lighting conditions, it’s common to encounter overexposed (too bright) or underexposed (too dark) photos. To combat this, take advantage of the iPhone’s built-in exposure control feature or third-party apps to adjust the exposure settings manually.
Alternatively, you can experiment with HDR (High Dynamic Range) photography, which allows you to capture a wider range of tones from shadows to highlights in a single image.
Another technique to address overexposure or underexposure is to use exposure bracketing. This involves taking a series of photos at different exposure levels and then combining them in post-processing to create a well-exposed final image.
Tips and Tricks for Better Long-Exposure Photos
Becoming proficient in long-exposure photography is a continuous learning process. Here are a few tips and tricks to improve your long-exposure photos:
Mastering the Art of Patience in Long-Exposure Photography
Long-exposure photography requires patience. Waiting for the perfect moment, setting up your equipment, and waiting for long exposures can be time-consuming. However, the results often surpass the initial effort. Embrace the slower pace and enjoy the artistic journey.
Experimenting with Different Subjects and Environments
Long-exposure photography opens up a world of creative possibilities. Experiment with different subjects, such as waterfalls, cityscapes, or even people in motion. Vary your environments, lighting conditions, and exposure settings to create unique and captivating images.
With your iPhone in hand, you have all the tools necessary to take stunning long-exposure photos. So, let your imagination run wild, explore new techniques, and capture mesmerizing images that showcase your creativity.
Furthermore, when delving into long-exposure photography, it’s essential to understand the impact of different shutter speeds on your images. Slower shutter speeds allow for more light to enter the camera, resulting in smoother and more blurred motion effects. On the other hand, faster shutter speeds can freeze motion and capture crisp details in low-light conditions.
Another aspect to consider is the use of neutral density (ND) filters in long-exposure photography. ND filters reduce the amount of light entering the lens without affecting the colors in the image. By using ND filters, you can achieve longer exposures even in bright lighting conditions, allowing for creative effects like silky smooth waterfalls or streaking clouds in the sky.